minimal framework Tutorial
A basic introduction to minframe, front-end frameworks and build tools
This tutorial is for people who have built a few websites and are familiar with HTML and CSS as well as directory structures and file paths. It assumes that you know little to nothing about npm, build-tools or front-end frameworks. Feel free to skip around if you are a little more advanced and are just looking for specific information.
Dependecies
NPM
TL; DR Reuse tested bits of code
minframe requires that you have node.js installed on your machine. Node.js comes with a package manager called NPM and is used to install and manage bits of open source code others in the community have written. This open source community allows us to build powerful applications much more quickly by combining existing code to perform tasks. minframe uses npm to automate many repetitive and time consuming development tasks. This lets you build sites better and faster!
Git Bash Shell
TL; DR Firing up minframe
Download Git and its Bash shell to get the files to your local machine and fire up the automated build tools. If you are not already using git and GitHub for version control you should be! This Udacity tutorial covers the basics so you can remotely store and share the revisions of projects you build.
Once you have NPM and feel confident enough to type a few CLI commands:
- Open your terminal and navigate to where you would like to download the package folder.
cd desktop - Download minframe.
git clone https://github.com/joshboyan/minframe.git - Rename the folder.
mv minframe PROJECTNAME - Change directories into the package you just installed.
cd PROJECTNAME - Change the GitHub remote repository to one you own.
git remote set-url origin https://github.com/USERNAME/YOURREPO.git - Verify the remote URL has changed.
git remote -v - Install the node_module dependencies.
npm install - Install gulp-cli globally
npm install -g gulp-cli - Start up the automated build and open chrome with Live Reload.
gulp
- Open components folder with your favorite text editor and create HTML markup in layouts and pages, add your Sass styles to scss and JavaScript to js.
- To stop the automated workflow tools, use:
ctr c /OR/ cmd c
File Structure
TL; DR How minframe is assembled
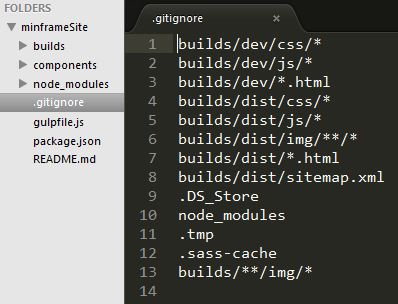
Once you have fired up the automated tools with npm in step 5 of the last section, open the minframe folder in your favorite text editor. You will notice 3 folders: builds components and node_modules as well as some supporting files. Let's look at the supporting files first.
.gitignore
TL; DR Only track what's neccesary
The .gitignore file is part of the Github and Git ecosystem. These are used for version control. This means keeping track of old copies of your websites, apps and other programs you are building. These are not required to use minframe but highly reccomended for anyone who writes code. You can follow the links in the begining of this paragraph to download Git and find tutorials on how to use Git and GitHub. Git Immersion is another great resource to help you use this invaluable tool.
The .gitignore file itself is a configuration file for the git client on your local machine. We use it to tell Git which directories and files we want ot ignore or NOT keep track of in our version control. We generally do not want to keep track of configuration files since everyone's machine is set up differently. In minframe, we want to ignore all the build directories because they are built from our components directory. Keeping track of them will slow down git commits and pushes. It is mainly just excessive.
gulpfile.js
TL; DR Automating your tools
Gulp is a javascript utility used to automate tasks in yuo rdevelopment workflow. It is a plugin based system whare each plugin does one thing very well. There are many more plugins available and I suggest you Google gulp-whatever you need to do if you require a utility in addition to what minframe provides.
The gulpfile.js is the set of instructions that is executed when you type the gulp command in your CLI. It controls the how each package we installed with NPM interfaces with your code.
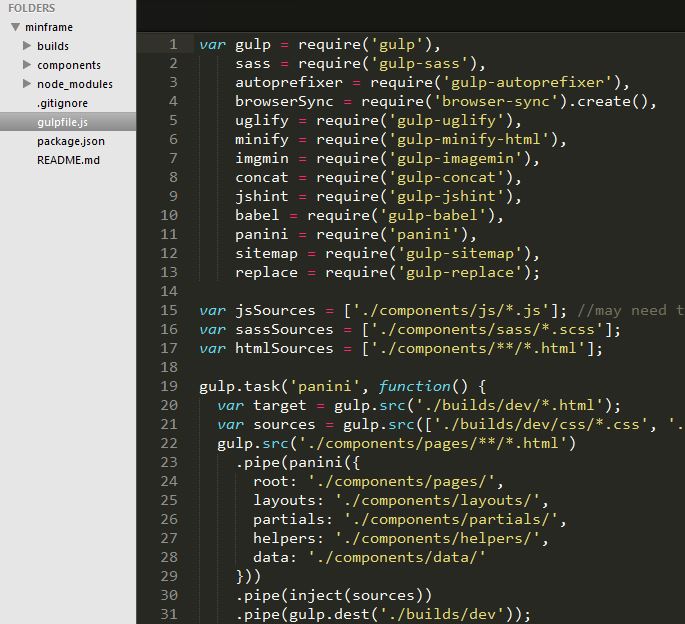
There are 5 steps to using gulpfile.js
- We assign each package and their alias to a unique variable at the top of the page.
- We create variables for our sources to keep everything neat.
- We create individul gulp.tasks that we can call each time we would like to run a process.
- We assign files for gulp to look for changes in and tasks to run when changes occur.
- We bundle the tasks and watchers into two main commands:
gulp - Runs in the background while we are working.
gulp dist - Creates a finished package to upload to a server via FTP.
You may want to change the page that initially loads with BrowserSync when working on pages other than index.html. to do this, search for the browse-sync gulp task and change the index to ./builds/dev/fileYouWantToLoad.html.
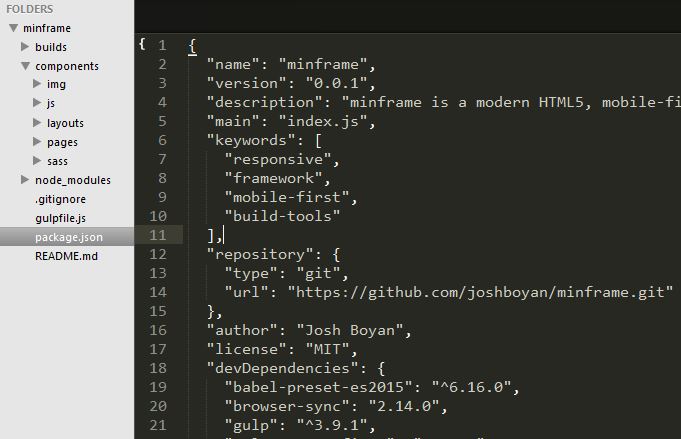
package.json
TL; DR Master list of tools
The package.json file is very simply an outline of the project. It contains information about the project, it's Git repo and all the node.js packages associated with the project. NPM uses this list to find all of the dependencies when you run npm install from the bash CLI while you are iside of the project directory.
components Directory
All of the descriptions in this section assume that you have executed the gulp command in NPM and it is currently running on your machine.
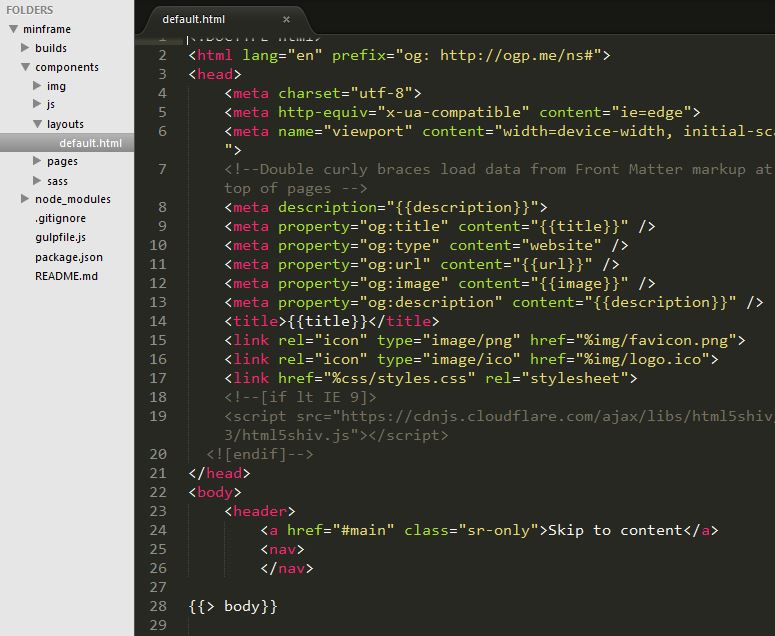
layouts
TL; DR Stop repetition in your code
Layouts are the basis of DRY templating using Panini. You build out your head, header, footer and nav 1 time in the default.html layout.Default.html is the layout all pages will default to unless you specifically call out a different layout in the Front Matter markdown at the top of each page.
Notice the double curly braces {{}} in the head of default.html. Each of these double curly braces correlates with the Front Matter markdown at the top of each page. minframe includes basic meta tags and Open Graph protocol tags. You can also add any other information that might need to vary from page to page such as schema.org microdata. Remember, one layout MUST be named default.html.
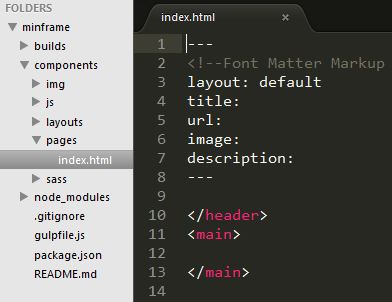
pages
TL; DR Unique content for layouts
Pages are the second component to DRY templating. This folder is where you create unique pages that will use the layout you call with the Front Matter markup at the top of the page. Notice how the terms to the left of the semi-colon (except layout:) correlate with the terms in the double curly braces in the default.html head.
Every time you save a file in the pages or layouts directories, the files are compiled and sent to the builds/dev directory where browserSync displays them in Chrome.
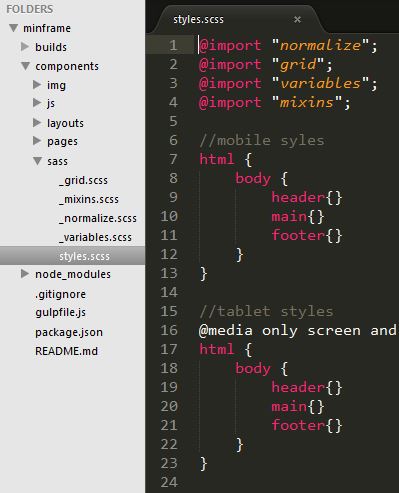
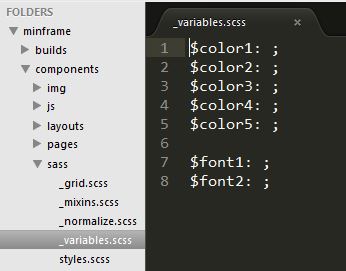
sass
TL; DR What CSS should be
Syntastically awesome style sheets, or Sass is a CSS extension langauge that needs to be compiled into CSS to run in the browser. It allows you to assign variables, create mixins, add logic to your stylesheets and much more. Check out their documentation for specifics of the langauge.
minframe clears many browser default styles with normalize.css and the styles.scss file comes with nested markup allowing you to access elements without filling your HTML with helper classes. We include three common media queries for larger screens for your convenience. It also seperates out the grid, mixins and variables for clarity then imports them into a single style sheet while compiling. You can add additional stylesheets by following the _filename.sccs naming convention and adding @import "filename"; to styles.scss.
When you save any file in the sass directory all the scss files are concatenated and compiled into CSS3. If there is an error in your styles the CLI will show an error and tell you which line it occurs on. If everything is good, the auto-prefixer adds any browser prefixes your code needs going back 4 versions in all major browsers based on info from caniuse.com and your browser will automatically update to reflect the changes.
img
TL; DR Where the pics live
The img directory functions exactly like you would expect it to. Place images in the folder for use on the various pages and layouts. All images will go through automatic "lossless" compression to optimize them for speed without affecting quality. When referencing images in .scss files use the normal file src="../img/yourImageName". New images added to your project while gulp is running will not display until you restart gulp with ctr c /OR/ cmd c and then gulp.
js
TL; DR Where the scripts live
The js directory also operates a little differently than you may be used to. All of your scripts go here and you can divide them into as many files as make sense for what you are doing. If you are using ES6 when you hit save your scripts are first ran through the Babel compiler to generate code that can run in the browser. Then all of your scripts are concatenated into one file to reduce server response time. The "use strict" command is added to the file. The file is then ran through JSHint to find any errors in your code. If one is found the process will stop and notify you exactly what and where the problem is in the CLI. Finally any npm requires var module = require('module'); are bundled using browserifyIf everything is good your browser will automatically update to reflect the changes.
builds/dev Directory
TL; DR Working build
The builds directory contains all of the concantenated and compiled code from your components files. This is the point where all your Sass and Javascript are linted and errors are served to your CLI. All images have been minified and all the code can run natively in the browser. Browsersync is watching the files and looking for changes in this directory.
builds/dist Directory
TL; DR Finished build
This is minified and compressed files ready for FTP upload to your server are stored after you run gulp dist. gulp dist generates a sitemap for all the files you have created and stores it hear. There are also some additional files that you generally want to include on your server such as a contact_process.php and .htaccess.
.htaccess
TL; DR Server configuration
The .htaccess file is a configuration file for Apache servers. The main thing it does is direct all 404 errors on our domain to 404.html. It also does some pretty great things like enablig gzip to speed up our load times and changing our sites caching settings so repeat visitors will still have our assets on their machine speeding up their load time.
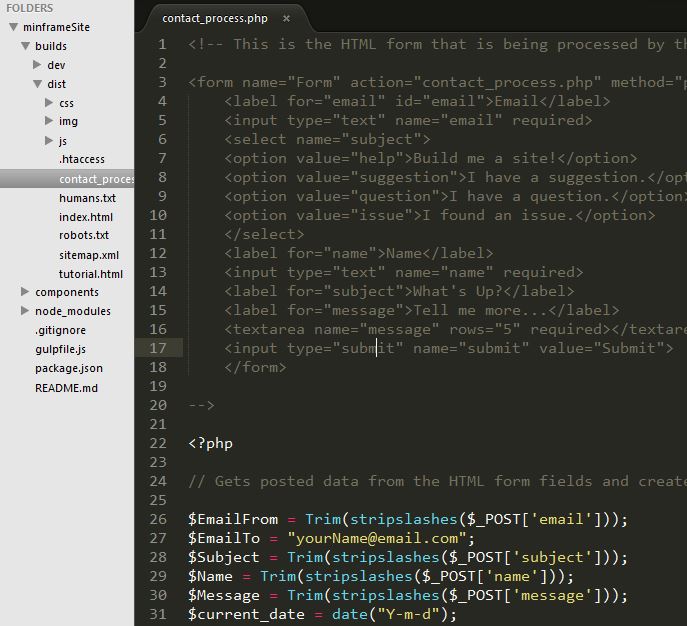
contact.php
TL; DR Back end for contact forms
This is the file that processes our contact form, validates and sanitizes the inputs on our server and sends us an email with the info. The file has a sample form with some common feilds at the top that you can use as a guide to build your own form. Of course you could also copy and paste it right into yuor HTML if it suits your purposes. Make sure to change
$EmailTo= "yourName@email.com";
This script also stores all of the submitted form info in a .csv file which is a comma deliminated file that can easily be eported to spreadsheets. If there are errors the default is to display a javascript alert about the specific issue. If you would like to direct them to error/success pages after simply change which is commented out at the bottom of the file.
robots.txt
TL; DR Search engine info
Make sure to add your sitemaps URL here once you generate it! Check out robotstxt.org if you want more info on how to use this file.
humans.txt
TL; DR Developer info
Take credit for your work, give your team props and talk about the project! Check out humanstxt.org if you want more info on how to use this file.
DRY Reusable Templates
TL; DR How to use layouts
Don't Repeat Yourself! Zurb's Panini flat file compiler allows us to create pages with consistent reusable layouts and partials. Only write your head, header, navigation and footer one time and reuse it across all of your pages. Only make edits once to change your entire site. If you need multiple layouts, just create them and call which one you would like to use in the Front Matter header on each page.
Front Matter Markup
Top of each unique page(↓index.html↓)
			---

			layout: default

			title: minframe | Mobile-first, Responsive, Light-weight Front-End Framework

			url:

			image:

			description: minframe is a modern HTML5, mobile-first framework built with Sass and Gulp on a 12 column responsive grid. The framework boasts all of the modern accessiblility features and tools developers use in builds but none of the style bloat.

			---
Template Head Tags
Populated from page Front Matter markup (↓default.html↓)
			<meta description="minframe is a modern HTML5, mobile-first front-end framework built with Sass and Gulp on a 12 column responsive grid. The framework boasts all of the modern accessiblility features and tools developers use in builds but none of the style bloat." />

			<meta property="og:title" content="minframe | Mobile-first, Responsive, Light-weight Front-End Framework" />

			<meta property="og:type" content="website" />

			<meta property="og:url" content="http://joshboyan.com/minframe/tutorial.html" />

			<meta property="og:image" content="img/minframeBadge.png" />

			<meta property="og:description" content="minframe is a modern HTML5, mobile-first front-end framework built with Sass and Gulp on a 12 column responsive grid. The framework boasts all of the modern accessiblility features and tools developers use in builds but none of the style bloat." />

			<title>minframe | Mobile-first, Responsive, Light-weight Front-End Framework </title>
Linking Assets
TL; DR Ensuring local assets work
Linking assets such as style sheets, images and exteranl Javascript files is a little different with minframe than you may be used to. You always need to use % for the root of the file path.
For example:
<img src="%img/nodejs.jpg" alt="nodejs.org">
<link href="%css/styles.css" rel="stylesheet">
<script src="%js/scripts.js"></script>
The reason we do this is the file compiler looks for % throughout all the html files and replaces it with the appropriate file path. While the gulp command is running, the compiler replaces all % with ./builds/dev/. This allows Browsersync to fund the files in the build folder and display changes. gulp dist simply removes the % so everything is linked properly on the server when you upload your distribution files.
The Grid
TL; DR Designing your interface
The Minimal Frameworks Responsive Grid is a 12 column, mobile-first design that scales up to fit all viewports. All columns are 100 width by default until 768px. Above 768px each column is 1/12th of the viewport. So this means:
- 2 equal columns each get the class of
.col6because 6+6=12 - 3 equal columns each get the class of
.col4because 4+4+4=12 - 4 equal columns each get the class of
.col3because 3+3+3+3=12
I based this grid off of the responsive grid system and removed the redundant classes. It is built with Sass mixins eliminating much of the div="class class class" markup that polutes the HTML files of other frameworks.
The section tag itself defines horizontal sections and clears floats much like div class="row" in Bootstrap. You also have the option of using div class="section" if that makes more semeantic sense. Columns only require one class col# where # is how many units out of twelve the column spans. Go ahead, resize your browser.
.section
.col1
.col1
.col1
.col1
.col1
.col1
.col1
.col1
.col1
.col1
.col1
.col1
.col2
.col2
.col2
.col2
.col2
.col2
.col3
.col3
.col3
.col3
.col4
.col4
.col4
.col5
.col7
.col6
.col6
.col7
.col5
.col8
.col4
.col9
.col3
.col10
.col2
.col11
.col1
.col12
Go Forth and Code!
That pretty much sums up what minframe has to offer. If anyting is not explained clearly enough please shoot me a message with the contac form below. If you find a bug or an issue please submit it to the GitHub repo. If you love or hate minframe you are also welcome to shoot me a message. All I ask is that you go build cool things!